
Propagating a Monstera Adansonii should be a reasonably straightforward task. These plants grow readily from cuttings, and this is a great way to get baby versions to give away or sell.
You can propagate this plant by taking a cutting from a healthy stem. The cutting will grow in water or soil, and as long as it has a growth node, it should be successful. It will take quite a long time to get a full Monstera plant from a cutting, however, so be aware of this before you start.
Let’s learn how to propagate Monstera Adansonii! We’re going to look at both water and soil propagation.
How To Propagate A Monstera Adansonii In Water
Monstera Adansonii plants are relatively easy to propagate in water, and many people prefer this method because it’s easier to tell whether the plant is establishing roots or not. You get to watch what is happening, whereas soil leaves you unable to see the plant’s development.
Step One) Clean Your Tools
You won’t need many tools for this process, but before you start, you should assemble a clean container with water in it and some sterile, sharp scissors or secateurs.
If you are using tap water, it’s a good idea to allow it to stand on the counter for about twelve hours before taking your cutting. This gives time for the chlorine to evaporate, which increases your chances of success.
You can sterilize the scissors/secateurs using hot water and soap, or rubbing alcohol if you prefer. Keeping them clean reduces the risk of introducing infection to either the cutting or the main plant when you create a wound.
Step Two) Select A Healthy Stem
Your cutting needs to be a few inches long, and if possible, it should have at least one or two leaves on it, as well as at least one growth node. This is a nodule from which a leaf or new stem would sprout in normal conditions, and it is crucial.
Your cutting may survive even with no leaves, but it must have a growth node. It is from this that the plant will sprout new roots. Without one, you cannot propagate a Monstera Adansonii.
Try to choose the healthiest stem you can see; the more vigorous the cutting, the more chances of it taking root quickly and growing into a strong plant. Having a few leaves will also help to ensure that it can generate food for itself while it is rooting and getting established.
Step Three) Cut The Stem
You should identify the point about a quarter of an inch below the growth node. Make a clean-cut, avoiding any ragged edges or tearing. The growth node should be on the cutting.
Step Four) Place In Water
If your cutting has more than three leaves or leaves that will be submerged or touching the water when the cutting is in the glass, you should remove them using your secateurs.
Too many leaves on the cutting will sap its energy before it has time to root. Although leaves create energy, they also drain it, so this is a fine balance.
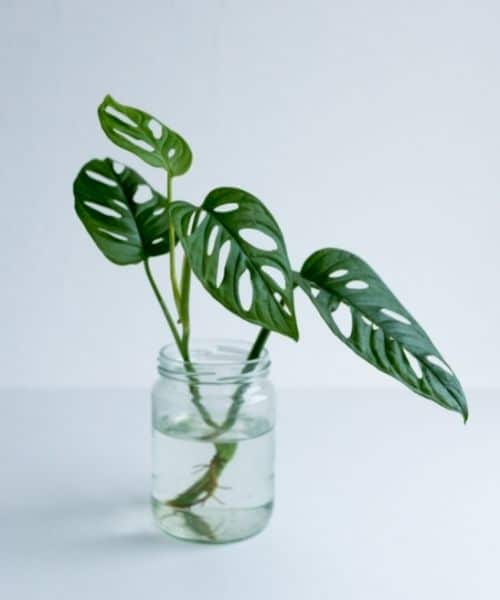
Once the leaves have been removed, place your cutting in a glass of water, and make sure that the node is beneath the surface of the water. The water will promote root growth.
If your cutting won’t stay upright or the node keeps trying to spring out of the water, use a peg to clip the stem to the side of the glass. Choose one that has a soft grip so it won’t damage the stem, or use fabric for protection – just make sure that the plant’s growth node stays submerged and does not get dried out.
Step Five) Put The Cutting Somewhere With Light
Next, position the glass somewhere with bright but indirect sunlight. No direct sun should fall on the cutting’s leaves or stem, but it does need lots of light.
Leave it there while roots establish themselves, but refresh the water every two or three days. This will ensure that bacteria and algae do not grow around the roots and infect or swamp the plant. It also ensures that there is plenty of oxygen around the plant’s growth node, which is important.
If the plant drinks enough water to leave the node exposed to the air, top the glass up.
Step Six) Wait For Roots
The cutting should root in around two or three weeks. You should see thin white hairs protruding from the growth node and stretching out into the water.
Keep your cutting in water even once these roots have started; they are not strong enough to survive being transferred to soil yet.
Wait until the roots get to at least three inches long, and then prepare a clean pot with soil. This pot should be fairly small. Plants don’t generally thrive if you give them too much room in their pots; it is better to work up gradually.
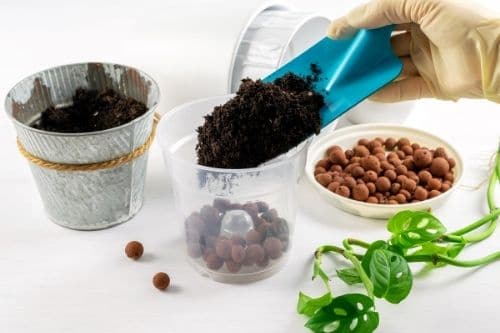
Coconut coir and standard potting compost will work well for the container. Mix them together, fill the pot, and then dig a small hole in the center and transfer your cutting over, handling it with care.
Pat the soil down around the Monstera plant’s roots and give it a support stick. Next, put it back in its spot with bright but indirect light and allow it to start growing. You have successfully taken a cutting at this point!
How To Propagate A Monstera Adansonii In Soil
It is perfectly possible to propagate a Monstera Adansonii in soil as well as water, and some people prefer this method. It saves you from having to repot the plant as soon; you can leave it in its propagation pot until it is reasonably large and well established.
You can propagate in soil using two slightly different methods; we will cover one first, and then the other.
Step One) Clean Your Tools
Again, you should start by assembling and cleaning everything that you will need for the cutting. In this case, you will need sterile scissors or secateurs and a clean container filled with suitable soil (a mix of coconut coir and potting compost). This will provide the plant with sufficient drainage and nutrients.
Clean your secateurs and make sure that they are sharp before proceeding. You don’t want to damage your Monstera by making a ragged cut; this won’t help either the main plant or your cutting to thrive.
Step Two) Select A Healthy Stem
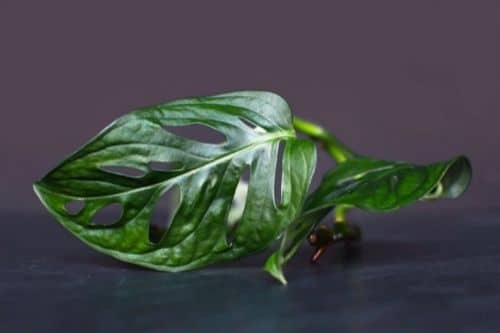
As in the previous instructions, it is important to select a stem that looks green, strong, and healthy. This has the best chances of succeeding as a new plant. Ideally, this stem should have a few green leaves, and at least one growth node.
Without the growth node, it cannot succeed because this is the only point of the stem that is capable of producing new roots. If you take a cutting without a growth node, it has no chance of surviving.
This is because the plant concentrates the hormones that promote growth in these nodes. The hormone is known as auxins, and it stimulates root growth when the right conditions are met.
You do not need rooting hormone when propagating a Monstera Adansonii because the plant is good at producing its own hormones, and should thrive from the cutting without this addition.
Step Three) Cut The Stem
Cut the identified stem about a quarter of an inch below the growth node. Make sure the node is intact and included in the new cutting.
Next, remove any leaves that are on the lower part of the stem. Leaves on the upper part can remain, but you may want to reduce their numbers so the plant is not trying to support too many at once. Two or three leaves will be sufficient.
Step Four) Plant The Cutting
Make a small hole in the potting compost and then lightly moisten the soil. Plant the end of the stem in the soil, making sure that the growth node is buried. If there is more than one node, it doesn’t matter – just make sure at least one is under the surface of the soil.
If any leaves are likely to get buried, remove them before you plant the cutting. Gently moisten the soil again, but don’t saturate it.
Step Five) Put The Cutting Somewhere Bright
Again, you want to place your Monstera Adansonii cutting somewhere that it can enjoy bright but indirect sunlight, and not get its leaves burned. You should keep the soil damp over the next few weeks while you wait for roots to develop.
Some people choose to cover the plant with a clear plastic bag at this stage, as this helps to trap moisture and warmth in with the plant. As Monsteras are native to rainforests, they benefit from this sort of environment. You don’t have to use a plastic bag, but it may prompt better growth.
If you do use the bag, remove it every day for a few hours to let the plant get some fresh air and prevent it from molding.
Step Six) Test The Cutting
One of the challenges of rooting a Monstera Adansonii in soil is that you can’t see whether it has rooted successfully. You don’t want to risk pulling it up, however. Wait at least three or four weeks, and then give the stem a very light tug.
If it resists the tug, roots are starting to develop. Continue to water it and ensure it has enough light. Don’t keep it perpetually wet, it must be allowed to dry out a little in between waterings, or the roots may rot.
If the cutting pulls out in your hand, it was unsuccessful. Try again with a new cutting.
Step Seven) Support And Repot When Large Enough

You should give your Monstera cutting a support stick once it gets a little bigger; this will help it to stay upright. When it gets too big for its container, repot it into a larger pot, but it should not need this straight away.
How To Propagate A Monstera Adansonii In Soil (Method Two)
Here, you’ll find the second method for propagating a Monstera Adansonii using soil. Some people find this method more effective because it is slightly easier to see if the plant is rooting, but you don’t have to change a pot of water every day.
Step One) Clean Your Tools
Once more, make sure that you start with sterile tools and a nice, clean pot for your cutting. You will need compost, coconut coir, and for this method, you will also need paper clips or bobby pins, or some other gentle fastener.
Sterilize everything using hot, soapy water. Although the clips will not come into contact with an open wound on the cutting, it’s still a good idea to get them clean before use.
Step Two) Select A Healthy Stem And Cut It
Again, you need to choose a stem that is healthy and robust if you want a strong plant. You may wish to do several cuttings at once with this method, or just stick to one as before.
If you want to take several cuttings, select a stem that has many nodes on it. You can get every node to grow into a new plant.
Make sure that you are cutting about a quarter of an inch below the first node, and then lift the stem away from the plant and make as many divisions as you wish to. Do not cut right through a node or too close to one at any point, because you will damage it and it won’t take root properly.
You don’t have to divide at every node; your plant will grow fine if it has multiple nodes. However, the more divisions you make, the more Monstera plants you will get. A section with no nodes will not root into a new plant.
Step Three) Plant The Cuttings
This time, instead of burying the cuttings in soil, you are going to prepare a large pot with coconut coir and compost. Next, lie the full vine (or the pieces of vine) across the surface of the compost, and turn it so that the node (or nodes) face into the soil.
You can scuff the surface of the soil up a bit so that it is touching the nodes if you want to, or just leave it. Lightly water the soil, and then use your paper clips or bobby pins to pin the vine (or sections of vine) down.
This will help to ensure the nodes stay facing the soil and moisture, which will encourage them to root. You can use anything that works for this, but paperclips or bobby pins tend to be effective and should not damage the stems.
Step Four) Put In Indirect Light
Position the pot in bright, indirect light. You can cover the pot with a plastic bag to keep the moisture and warmth in, but remove it daily so that the air can flow. This reduces the risk of mold.
Step Five) Wait For Roots
You should be able to see when the cuttings start to root with this method because the nodes are just above the surface of the soil. At first, the roots will be very fine hairs, but they should gradually lengthen and thicken.
Wait for them to reach at least three inches long before you plant the cuttings properly in individual pots. This will ensure that they are strong enough to handle. Each plant should be put in its own container, with coconut coir and compost as its potting medium. Provide a support for each one, and you’ve got new Monstera Adansonii plants!
Frequently Asked Questions
Why Didn’t My Cutting Take?
Sometimes, a cutting will be unsuccessful. If this happens, you should simply try again. It is possible that your cutting got either too wet or too dry while its roots were getting established; both of these issues could result in the cutting dying instead.
In some cases, you won’t be able to pinpoint what happened. Some cuttings simply aren’t strong enough or don’t have enough hormones to generate roots, but in general, Monstera Adansonii will root well, so have another go.
How Wet Should The Soil Be?
While the roots are establishing themselves, you should keep the soil damp. This ensures the plant has access to moisture. However, you do not want to saturate the soil, or the roots may rot.
You may find that a plant mister is the best way to water your cutting, as it will let you moisten the soil without flooding it.
Will My Main Plant Keep Growing?
Yes, the main Monstera plant will continue to grow once you have taken a cutting. In some cases, taking cuttings can actually encourage more growth.
Conclusion
A Monstera Adansonii plant is usually easy to propagate, as long as the main plant is healthy and producing new growth. Take a cutting from one of its stems, ensuring that it has at least one growth node. As long as you keep this damp, it should start to root, and you can then plant up your new Monstera when it’s strong enough.