Do you have an orchid that is looking cramped in its container? If so, you might be wondering whether the time has come to repot it, and how you should go about doing this. Fortunately, there are a few signs that will tell you when an orchid needs a new pot.
The top signs an orchid is ready for a new container include roots growing out of the pot’s drainage holes and water running straight through the pot to the base. You can repot an orchid by selecting a suitable new container, removing the plant from the old pot and trimming any damaged roots, and then putting it in the new pot.
Top Signs Your Orchid Needs Repotting
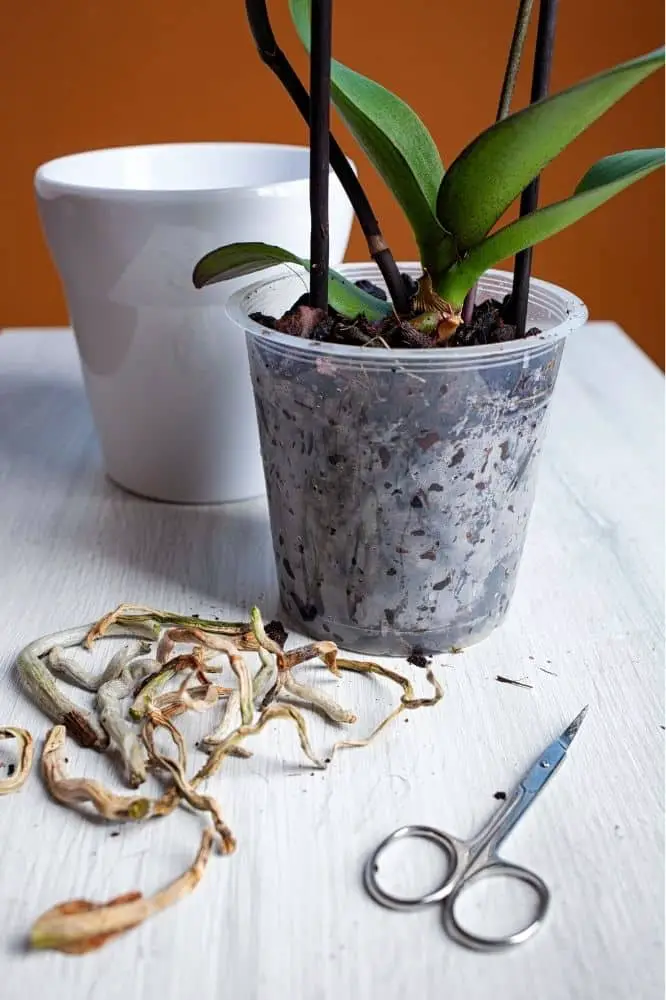
There are a few signs that tell you if your orchid is ready for a bigger container, so let’s start by exploring those. They include:
- Roots growing out of the drainage holes at the bottom of the pot
- Roots growing out of the top of the pot and into the air
- The plant drying out too quickly and water does not stay in the pot
- The roots rotting
- The roots escaping through the slits at the edge of the pot (if it has these)
- The soil crumbling and degrading
You can generally tell when an orchid needs repotting because many orchids are grown in clear containers. If it looks like your plant is trying to break out and most of the growing medium has gone, your plant needs a larger pot!
Let’s look at each of these signs in more detail.
1) Roots Growing Out Of The Drainage Holes
If your orchid’s roots are appearing at the drainage holes and starting to push their way through those holes and out of the pot, it’s a clear sign that the pot is no longer big enough. Orchids don’t tend to mind being a little cramped, but when they start doing this, a larger container is needed.
2) Roots Growing Out Of The Top Of The Pot
As with roots poking out of the drainage holes, if you notice a lot of roots protruding from the soil at the surface of the pot, your orchid may need more room. One or two roots branching into the air isn’t much to worry about, since orchids are epiphytic and they can develop aerial roots.
However, if a lot are growing out of the pot, your orchid is looking for more space, and you should provide it.
3) The Orchid Drying Out
If you feel like you are constantly watering your orchid and yet the inside of the container is always dry, there’s a high chance that the plant needs repotting. If it has broken down most of its growing medium, the water cannot be soaked up and held in the container, and it will run out of the bottom too fast.
Giving the orchid a bigger pot and fresh growing medium should solve this problem.
4) The Roots Rotting
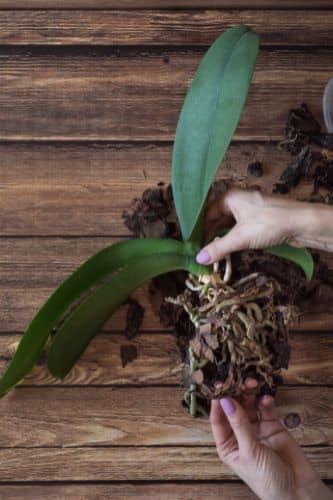
If your orchid’s roots are rotting, this is a sign that they are getting too compacted and don’t have enough oxygen flowing over them. This happens when they are crammed into a small space, so make sure to provide a bigger container.
Root rot is serious and can kill your orchid quickly – you’ll need to take action as soon as possible.
Learn more about this subject in this article: How to Fix Orchid Root Rot (Causes, Symptoms, and Fixes).
5) Roots Escaping From The Sides Of The Pot
Many orchid pots have splits in the sides to allow more oxygen to flow over the plant’s roots, and if your plant is pushing its roots out through these, this is another clear sign that it is too cramped.
6) The Soil Has Degraded
A final sign that your orchid needs repotting is that its potting medium has broken down and become compacted. Even if the container is still large enough, you will need to provide your plant with fresh potting medium.
A compacted growing medium will have a very negative impact on your plant. Orchids like to be planted in a loose medium since they naturally grow on the bark of trees with minimal soil or debris around their roots.
How To Repot An Orchid
Once you have determined that your orchid needs repotting, it’s important to explore the proper method for doing this in a way that won’t stress your orchid out, damage its roots, or otherwise destroy the plant. There are quite a few steps for repotting an orchid:
- Choosing your container
- Preparing the materials
- Preparing the orchid to move
- Cleaning the roots
- Putting the orchid in the new container
- Caring for the orchid after repotting it
Let’s explore each of these in detail so you know how to repot your orchid with minimal risk of damaging it.
Step 1) Choose A Container
Before repotting your orchid, you need to make sure that you have a suitable container ready. Do not use just any old plastic pot that you have lying around. Orchids need superb drainage and they prefer to have good airflow over their roots.
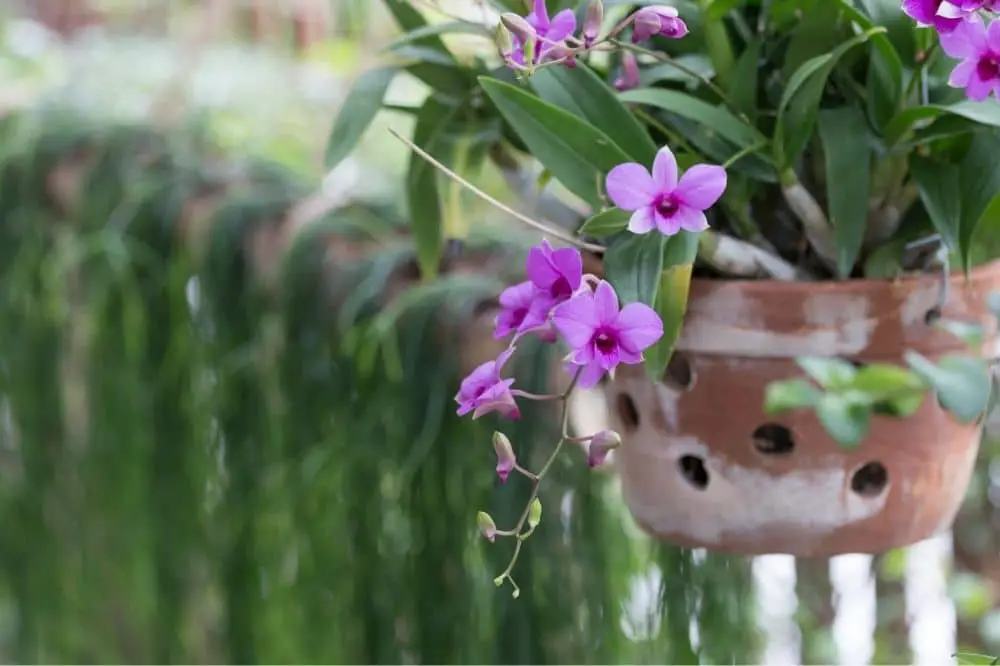
This usually means purchasing a special container for them, as many orchid containers have slits at the sides to increase the airflow. You can buy a terracotta pot if you prefer, but make sure that the drainage is as good as it can be.
Don’t put your orchid in a pot that is significantly bigger than its current container. This causes a high risk of the plant getting over-watered. Most orchids also prefer to be a little cramped, rather than having excess space.
Step 2) Prepare The Materials
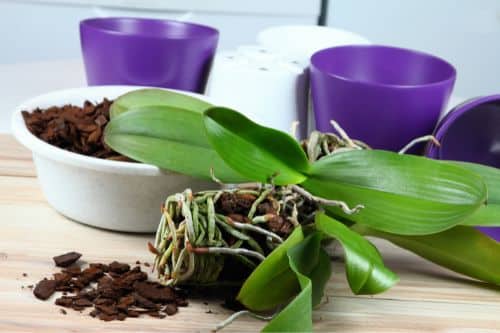
The first thing you should do is get everything you need ready. To repot an orchid, you will need:
- A suitable container, only a little bigger than the current one
- Some suitable potting medium, such as orchid bark
- A pair of sharp shears and some rubbing alcohol
You should start by thoroughly sterilizing both the shears and the new container with rubbing alcohol. Orchids are quite susceptible to disease and bacterial infections, and if you cut your orchid with dirty shears or put it in a dirty container, there’s a high risk of it getting sick and dying.
Use a clean cloth to wipe everything down with rubbing alcohol, and then allow it to dry. You can also sterilize tools by boiling them if you prefer, but this may destroy plastic containers.
Once you have everything assembled, you can move on to the next step.
Step 3) Prepare The Orchid To Move
Take your orchid and set it on the surface that you are working on, and give it a good drink. This will help to make the roots supple and reduce the risk of them breaking while you are handling the orchid. Dry orchid roots are brittle and are at great risk of snapping.
A few snapped roots won’t kill your orchid, but it does increase the risk of it getting an infection and being stressed by the transfer.
Next, it’s a good idea to cut off the flower spikes. Any existing flowers are very unlikely to survive if you repot the plant because it will get at least a little stressed by the transfer.
Furthermore, the spikes will inevitably take energy from the plant. Orchids pour all their energy into their flowers when they produce them and don’t focus on root or leaf growth. However, when you move the plant into a new container, you want it to focus on re-establishing its root network.
By removing the flowers, you give your orchid a better chance of surviving the process and reduce the risk of transplant shock.
With all this done, you can then gently lift the orchid out of its current pot and set it on a sheet of newspaper. If it is very rootbound, this may be a little difficult to do.
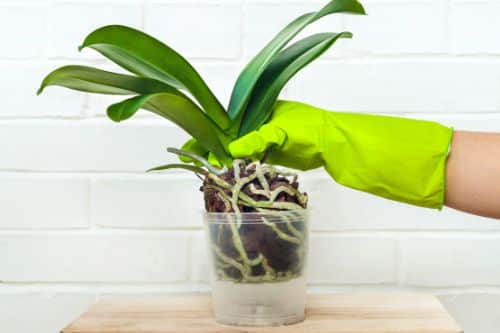
Gently squeeze and flex the pot until the roots are loosened, and then pull the plant out. Make sure you are pulling the base, not tugging at the foliage, as it may tear off the roots.
If the orchid doesn’t come readily, wriggle it from side to side and use your finger to push any roots that have come through the drainage holes back the other way. It’s best not to break them if you can avoid it.
Step 4) Clean And Trim The Roots
Once you have your orchid out, take the time to inspect its roots thoroughly. Shake all the potting medium away so you can see what you’re doing. You don’t want to move any old potting medium to the new container, so consider rinsing the roots if any is clinging to them.
Next, look for any damaged or rotting roots. Re-sterilize your shears, and use them to trim the roots that are no longer benefiting the plant. Any roots that have gone mushy, dried up, or become heavily discolored can be cut away. Healthy roots should be green or white, and thick and firm.
If necessary, take off any dead leaves at this point too.
Step 5) Put The Orchid In The New Container
Your orchid should now be ready to go into the new container. Gather up the roots and lift them into the bottom of the new container, and check that it is the correct size.
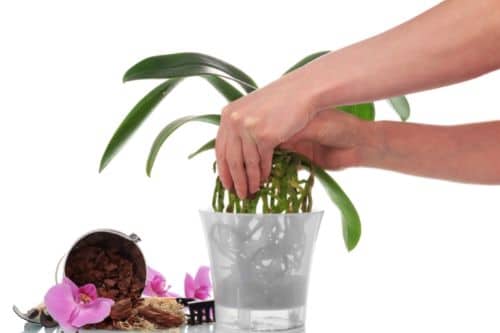
Lift the plant back out and put a layer of potting medium at the bottom, and then again place the orchid in the pot and check it is in the right position. The top of the roots should sit a little below the surface of the pot.
Next, start filling in around the roots with the potting medium, working gently while you shake the medium in around its roots. Be careful not to damage them as you add the soil.
It may help to have someone else hold the orchid upright while you do this, so you can make sure that the orchid is straight in the container. Keep gently filling around its roots with the growing medium until the pot is full, and stop before any of the leaves are covered by the soil. The soil should be level or almost level with the top of the pot.
Avoid patting the orchid mix down too much. Although the orchid shouldn’t be loose in the pot, these plants like to have a good level of airflow over their roots. They will not appreciate you pressing the potting medium down around them.
Step 6) Care After Repotting
Stake your orchid when you have finished potting it, especially if it has flowers. The stake will hold these steady and make sure the plant is kept upright while it reestablishes its root network in the new container.
Next, move your orchid to a cool, well lit spot away from direct sunlight, and leave it to recover. It usually takes a few days for orchids to get over the transplant shock, as they are quite delicate plants. If you left any flowers on the plant, expect it to lose these (and remove the spikes when it does) as a result of being transplanted.
However, your orchid should soon recover and start to look green and healthy again. Keep tending to it as you did before, and wait for the next time it needs repotting.
Conclusion
Repotting an orchid should be done every year or two, depending on how fast the plant grows.
Orchids like to be a little cramped and will not mind a small pot for a while. However, don’t let them get really rootbound, or there is an increased risk of root rot.
When the roots start coming out of the drainage holes, it’s time to repot your plant!
